

How Do I Airdrop Mac To Iphone
 Source: Christine Romero-Chan / iMore
While most of your photos are probably on your best iPhone thanks to the built-in Photos app, what about the images that you have on your favorite Mac? We're talking about your stunning photos taken with your DSLR of choice, a point-and-shoot camera, or just images that you've collected from all over the internet? How are you supposed to get those pictures on your Mac to your iPhone or iPad?
The easiest solution is probably to use the iCloud Photo Library because all of your photos, whether from your iPhone 12, iPad, or Mac, get synced in full resolution across all of your devices. But of course, this requires enough space for your entire photo library, which means you need a paid iCloud storage tier. Thankfully, there are other ways to transfer photos from your Mac to your iPhone, so don't sweat it — we'll show you all you need to know. And we also have a guide on how to transfer photos from your iPhone to your Mac instead, if you need that too.
What content can I view on my iPhone or iPad?
The Photos app on iPhone and iPad can display several different types of file formats without issue. These will all appear fine in the Photos app, but you won't be able to tell what format they are on the surface — it will all appear rather seamless.
- JPEG
- PNG
- TIFF
- RAW
- HEIF (these are HEIC images and is what your iPhone saves natively if High Efficiency is turned on)
- Live Photos
- GIF (these only animate in the Photos app on iOS 11 or later or macOS High Sierra or later)
- MP4 video
- HEVC video (similar to HEIC, it is the High-Efficiency video format)
- Slo-mo video
- Time-lapse video
As long as your photo or video is in one of these formats, it will show up fine in the iOS Photos app once you transfer photos from your Mac to your iPhone. Otherwise, you'll want to consider using the iOS Files app.
How to use iCloud Photo Library
iCloud Photo Library is probably the easiest way to keep your photos on Mac and iPhone in sync, but you do need a newer Mac that can get the Photos app on it (macOS Yosemite and later). Here's how to enable the iCloud Photo Library.
- Launch the Photos app on your Mac.
- Click Photos in the top left of the menu bar and select Preferences (or click the Command and , keys on the keyboard).
- Click the iCloud tab.
-
Make sure that the iCloud Photos option is checked.
 Source: iMore

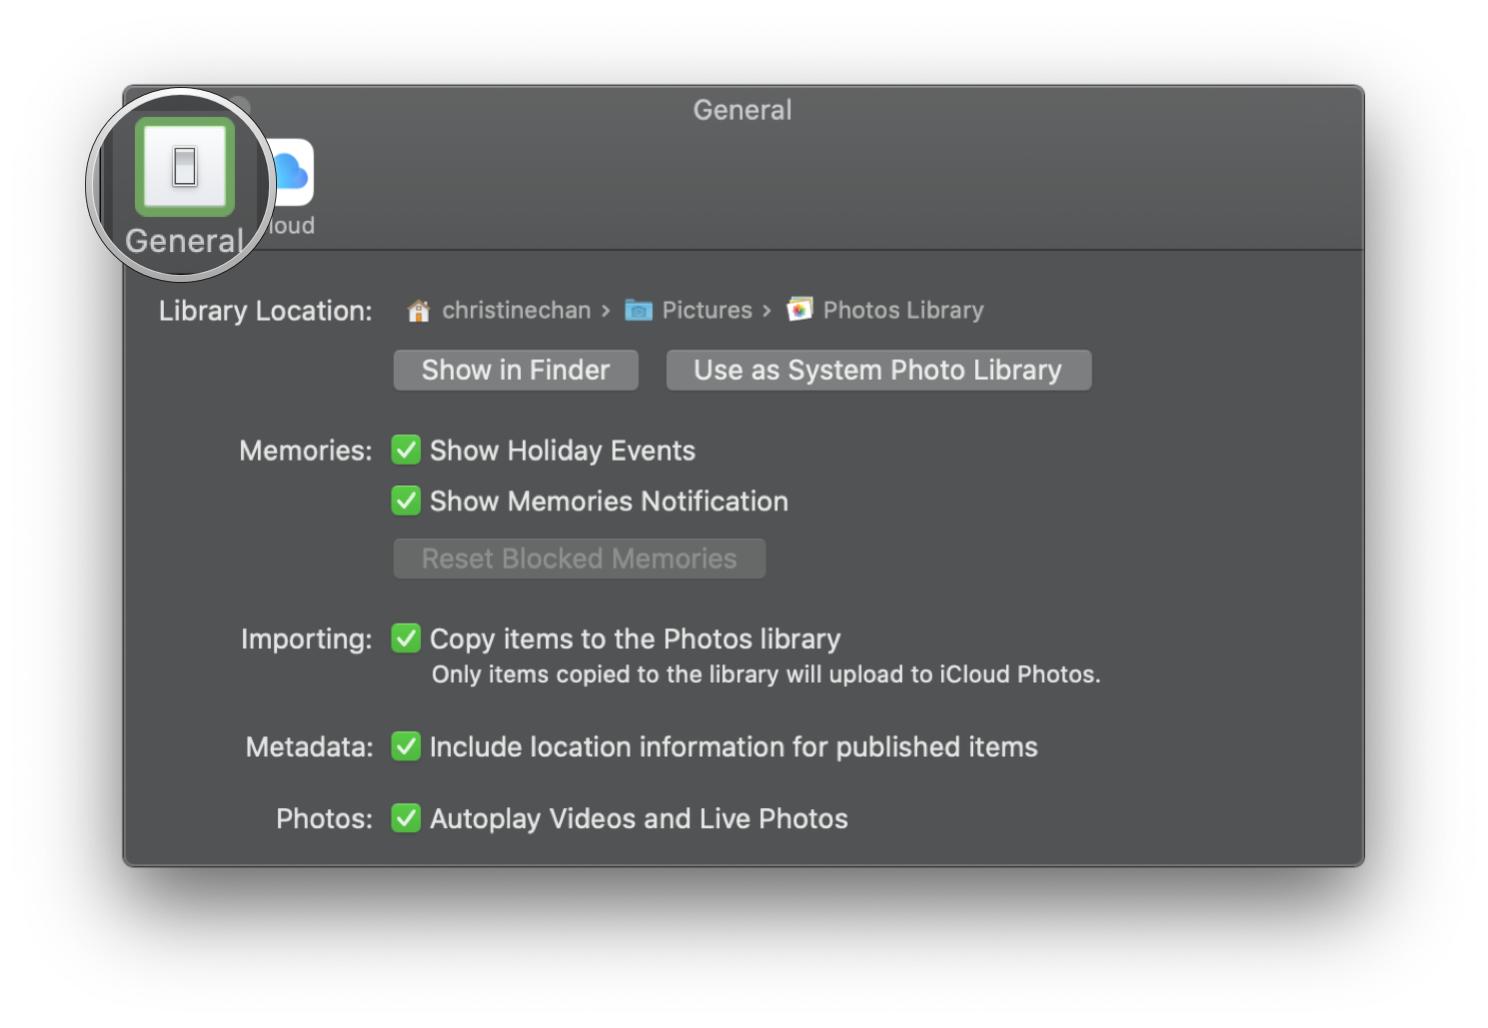
If this is the first time you are launching Photos on Mac in macOS Catalina or later, you may need to make sure that the System Photo Library is on before you can enable the iCloud Photos option.
-
In the Preferences for Photos app, click General.
 Source: iMore
 -
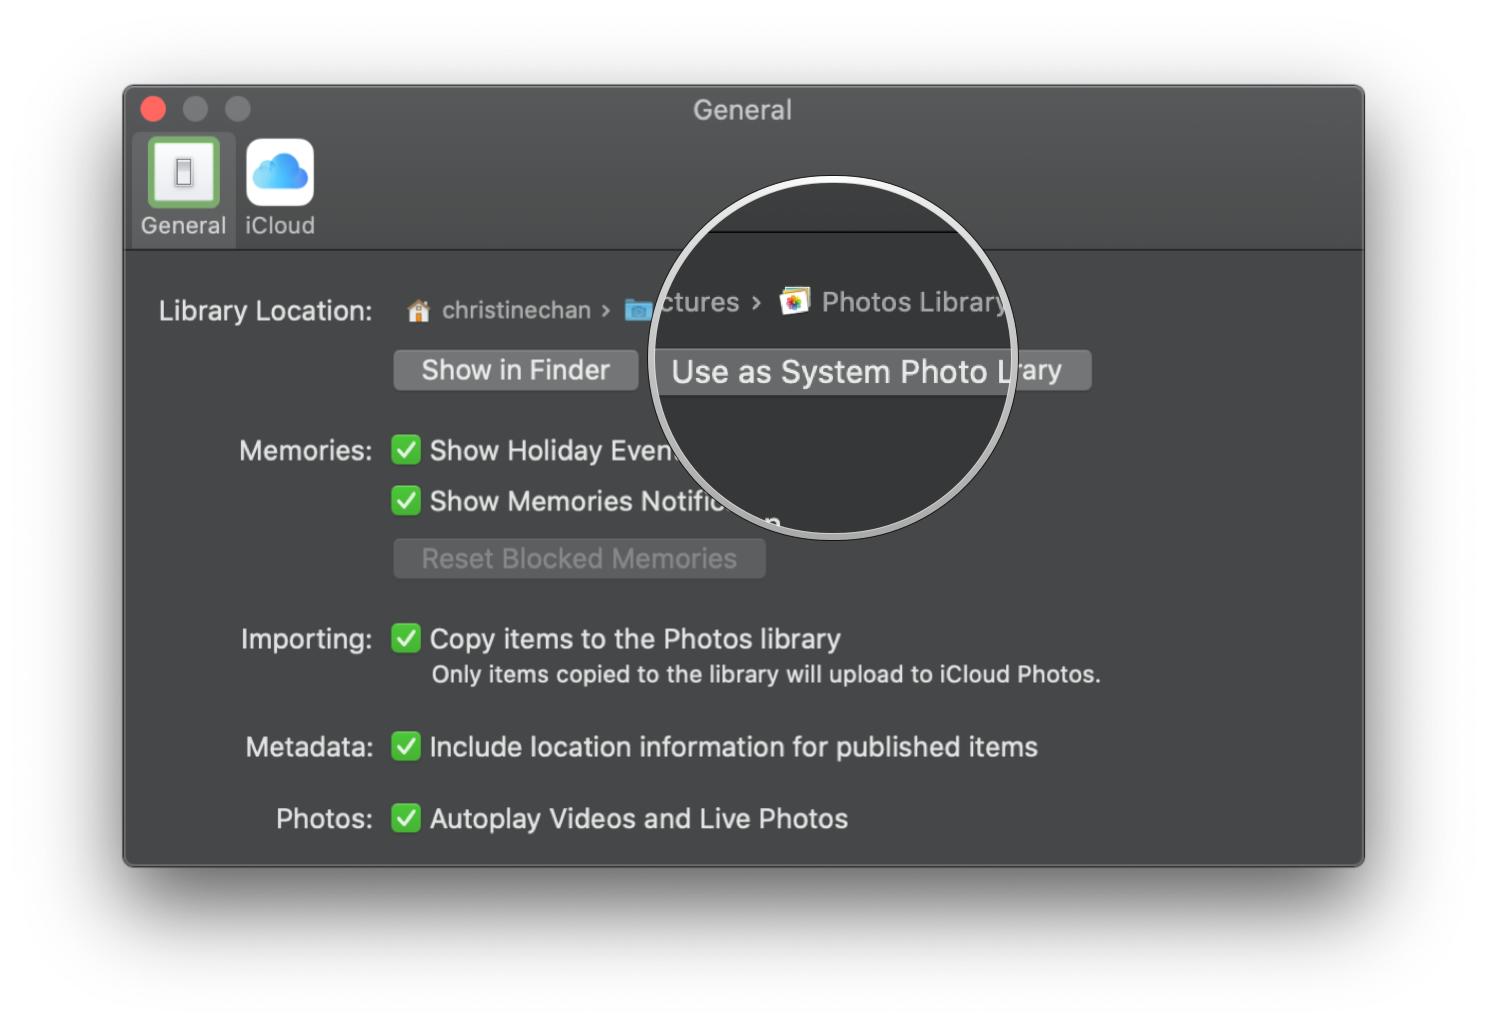
Click Use as System Photo Library. It may take a little bit of time to complete.
 Source: iMore


When you have the iCloud Photos option enabled on your Mac, you will want to ensure that it's also enabled on your iPhone or iPad.
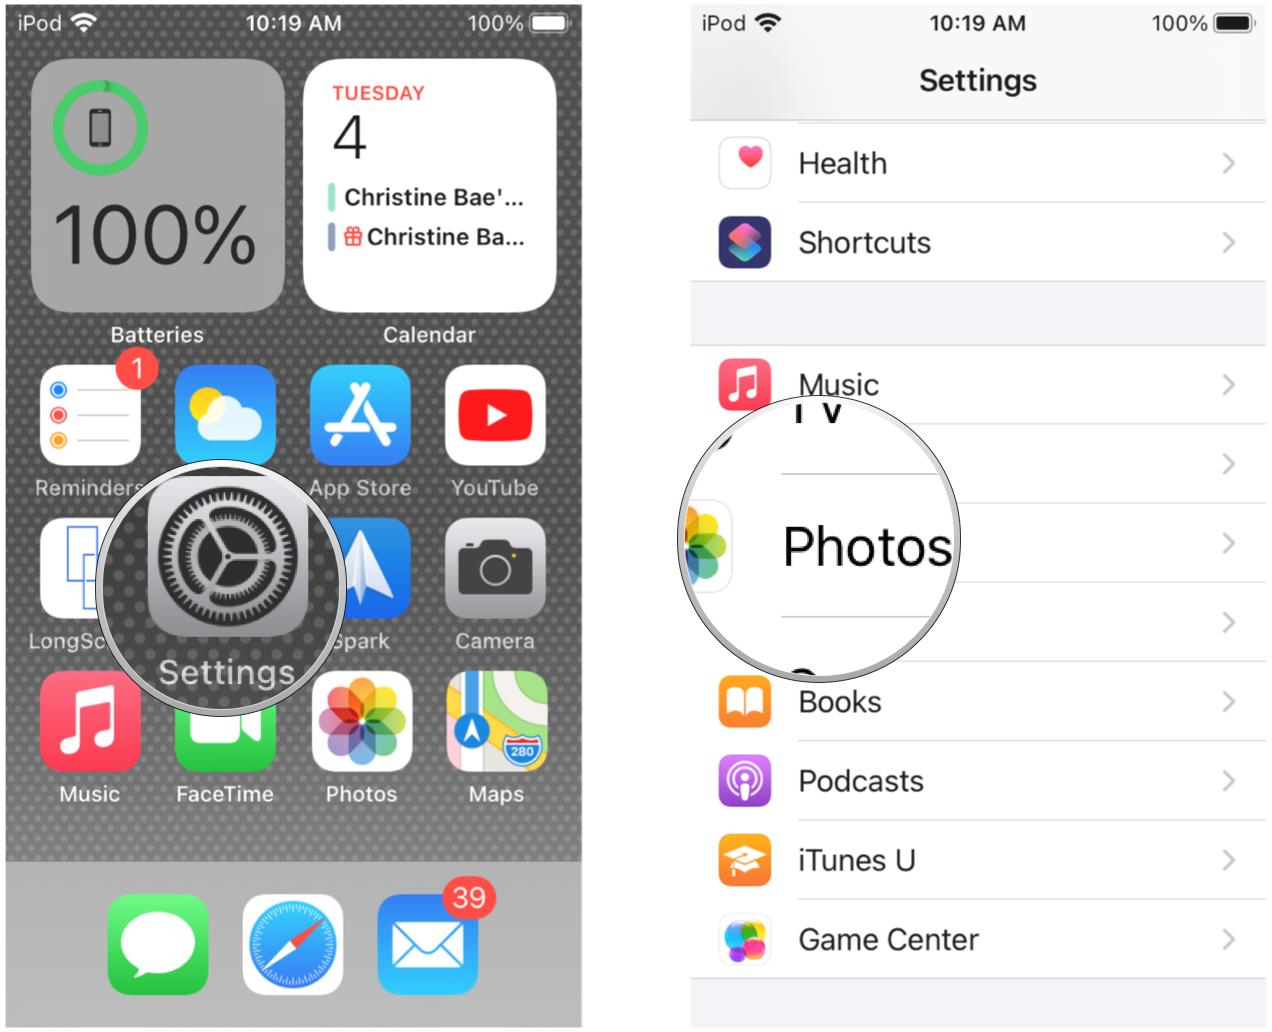
- Launch Settings on your iPhone.
-
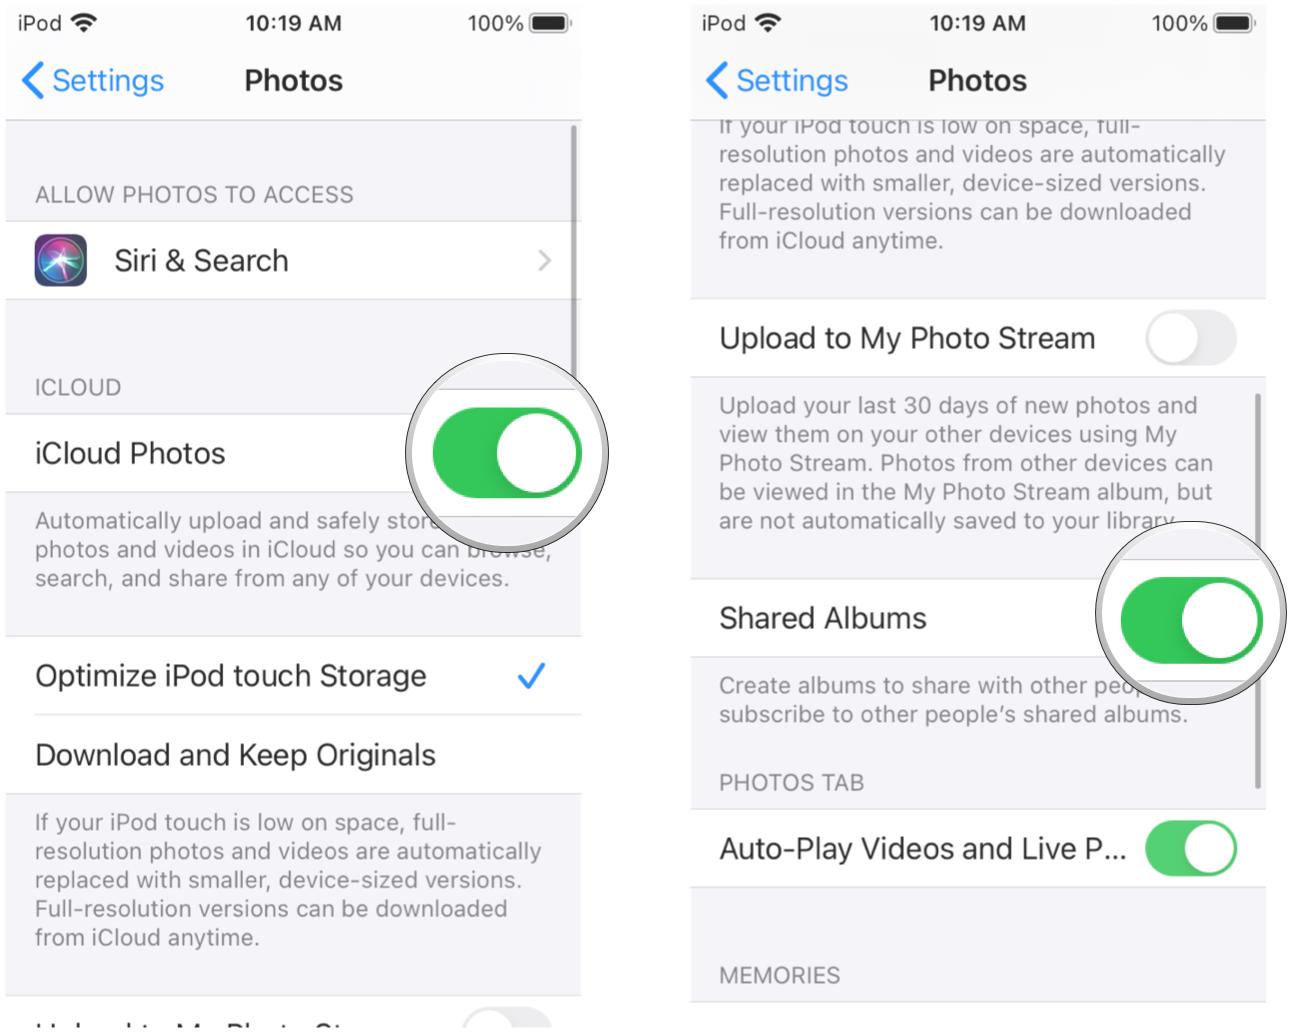
Scroll down and tap on Photos.
 Source: iMore
 - Tap the toggle for iCloud Photos to ON (green).
-
You can also turn the toggle for Shared Albums to ON (green) if you want to share your iCloud Photos albums with others.
 Source: iMore


Once iCloud Photos is enabled, it may take up to 24 hours before all of your content is synced up between devices. iCloud Photos also won't sync unless you're on WiFi, so make sure that's good to go before wondering where all of your content is.
Upload photos from iCloud.com
If you don't want to deal with iCloud Photos (it does come with some headaches), you can actually use the good old-fashioned method of uploading to the web. That's right — iCloud Photos can be accessed from the web, and it's another way to transfer photos from Mac to iPhone, or any platform, really.
- Make sure that you have iCloud Photos enabled on your iOS devices.
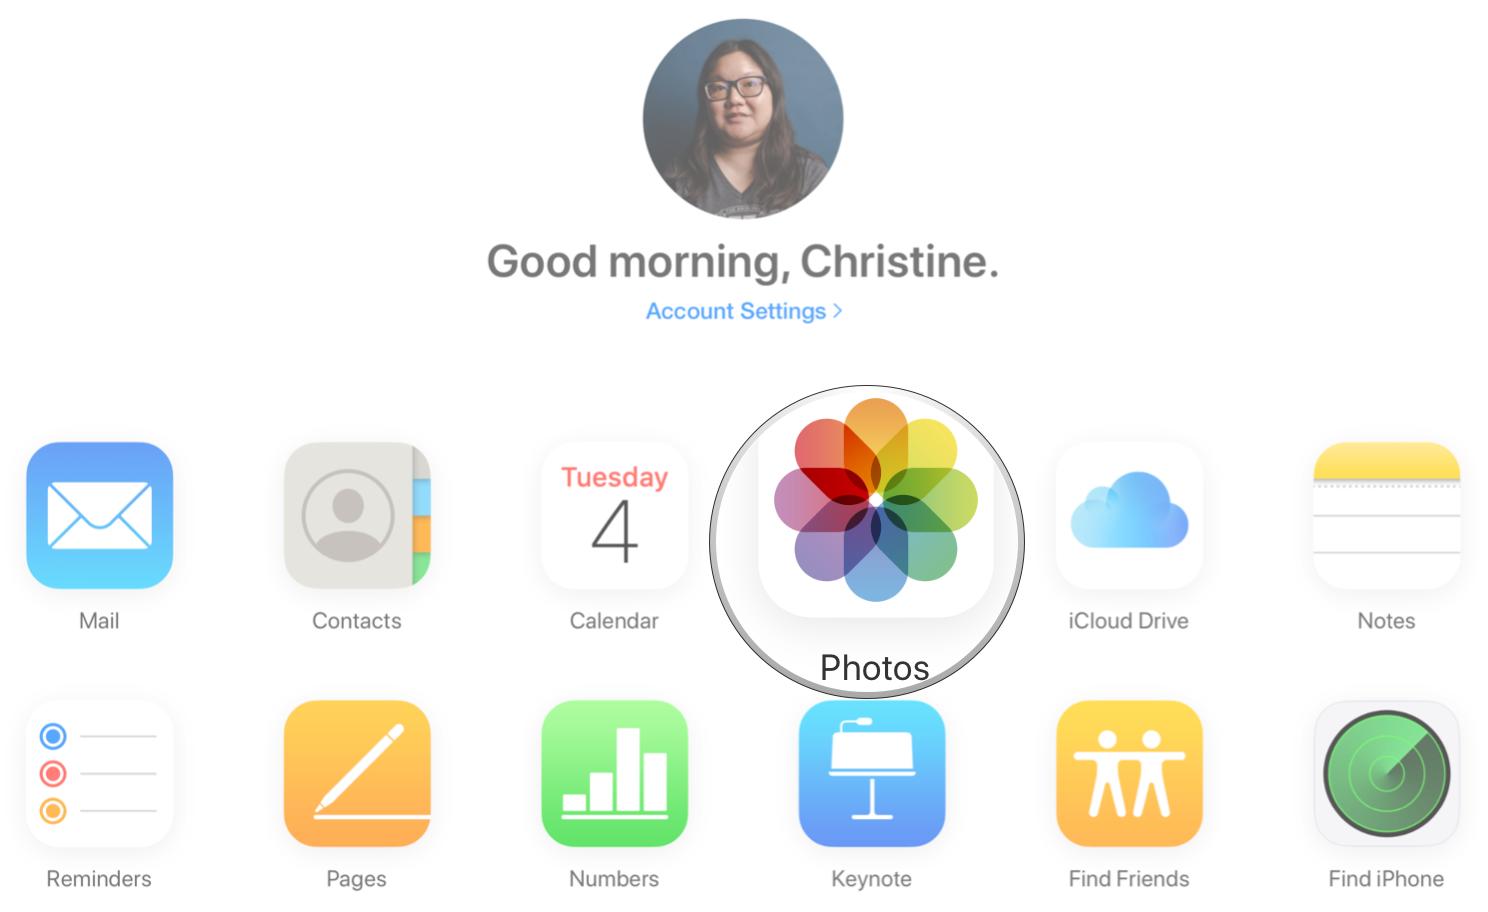
- Visit icloud.com and sign in to your Apple ID.
-
Click the Photos icon.
 Source: iMore
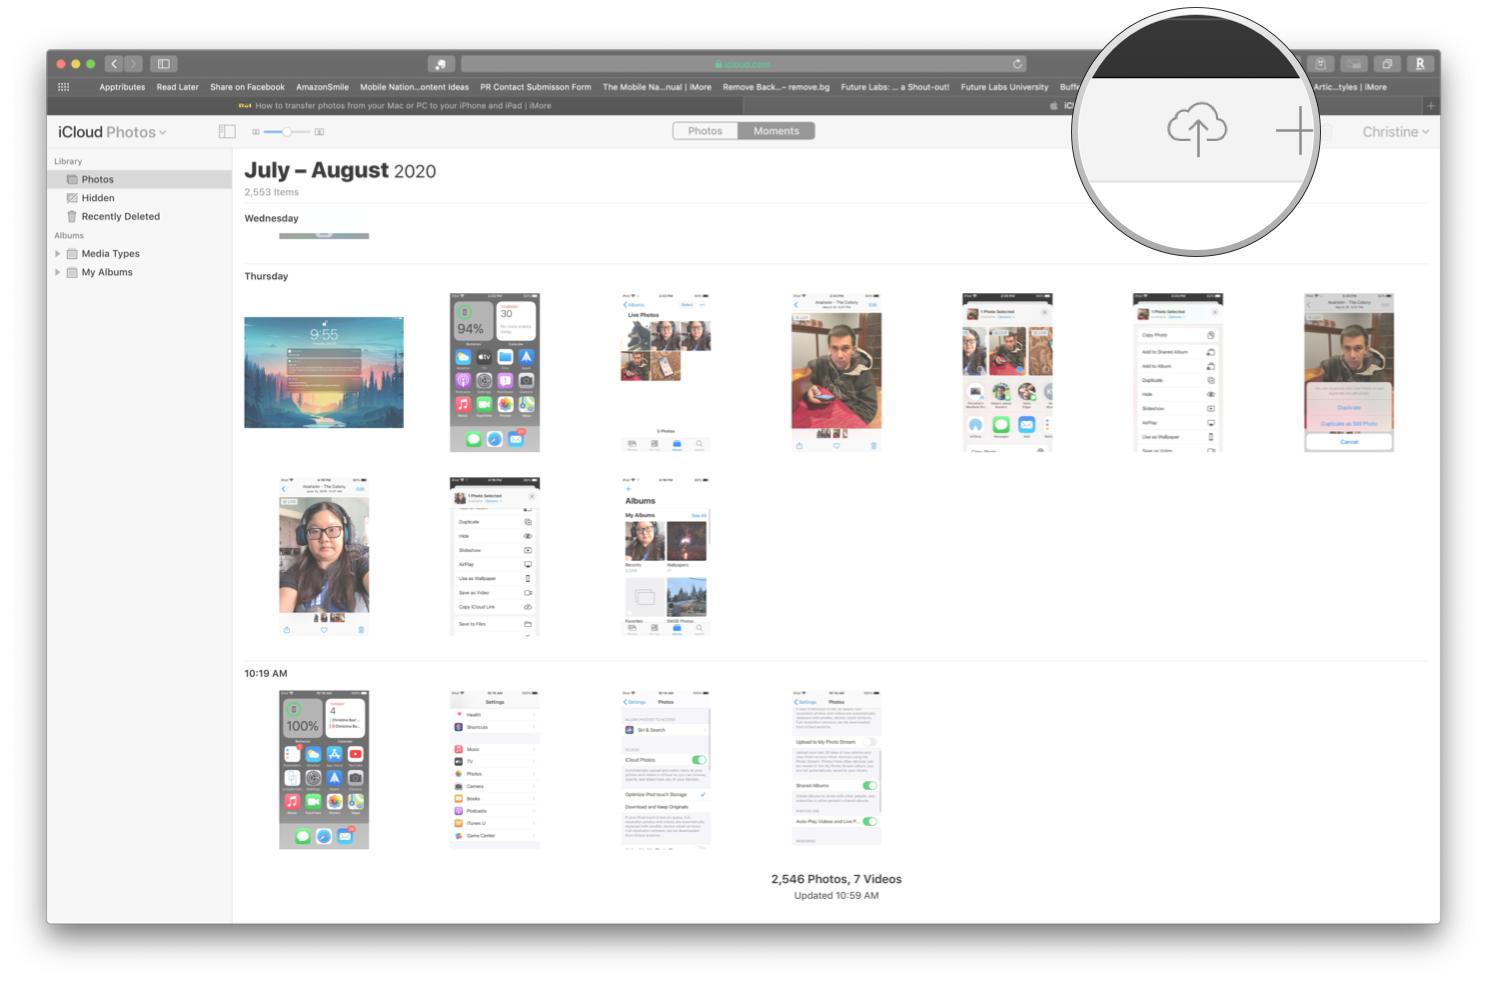
 -
After everything loads up, click the Upload button (it looks like an up arrow to a cloud icon).
 Source: iMore
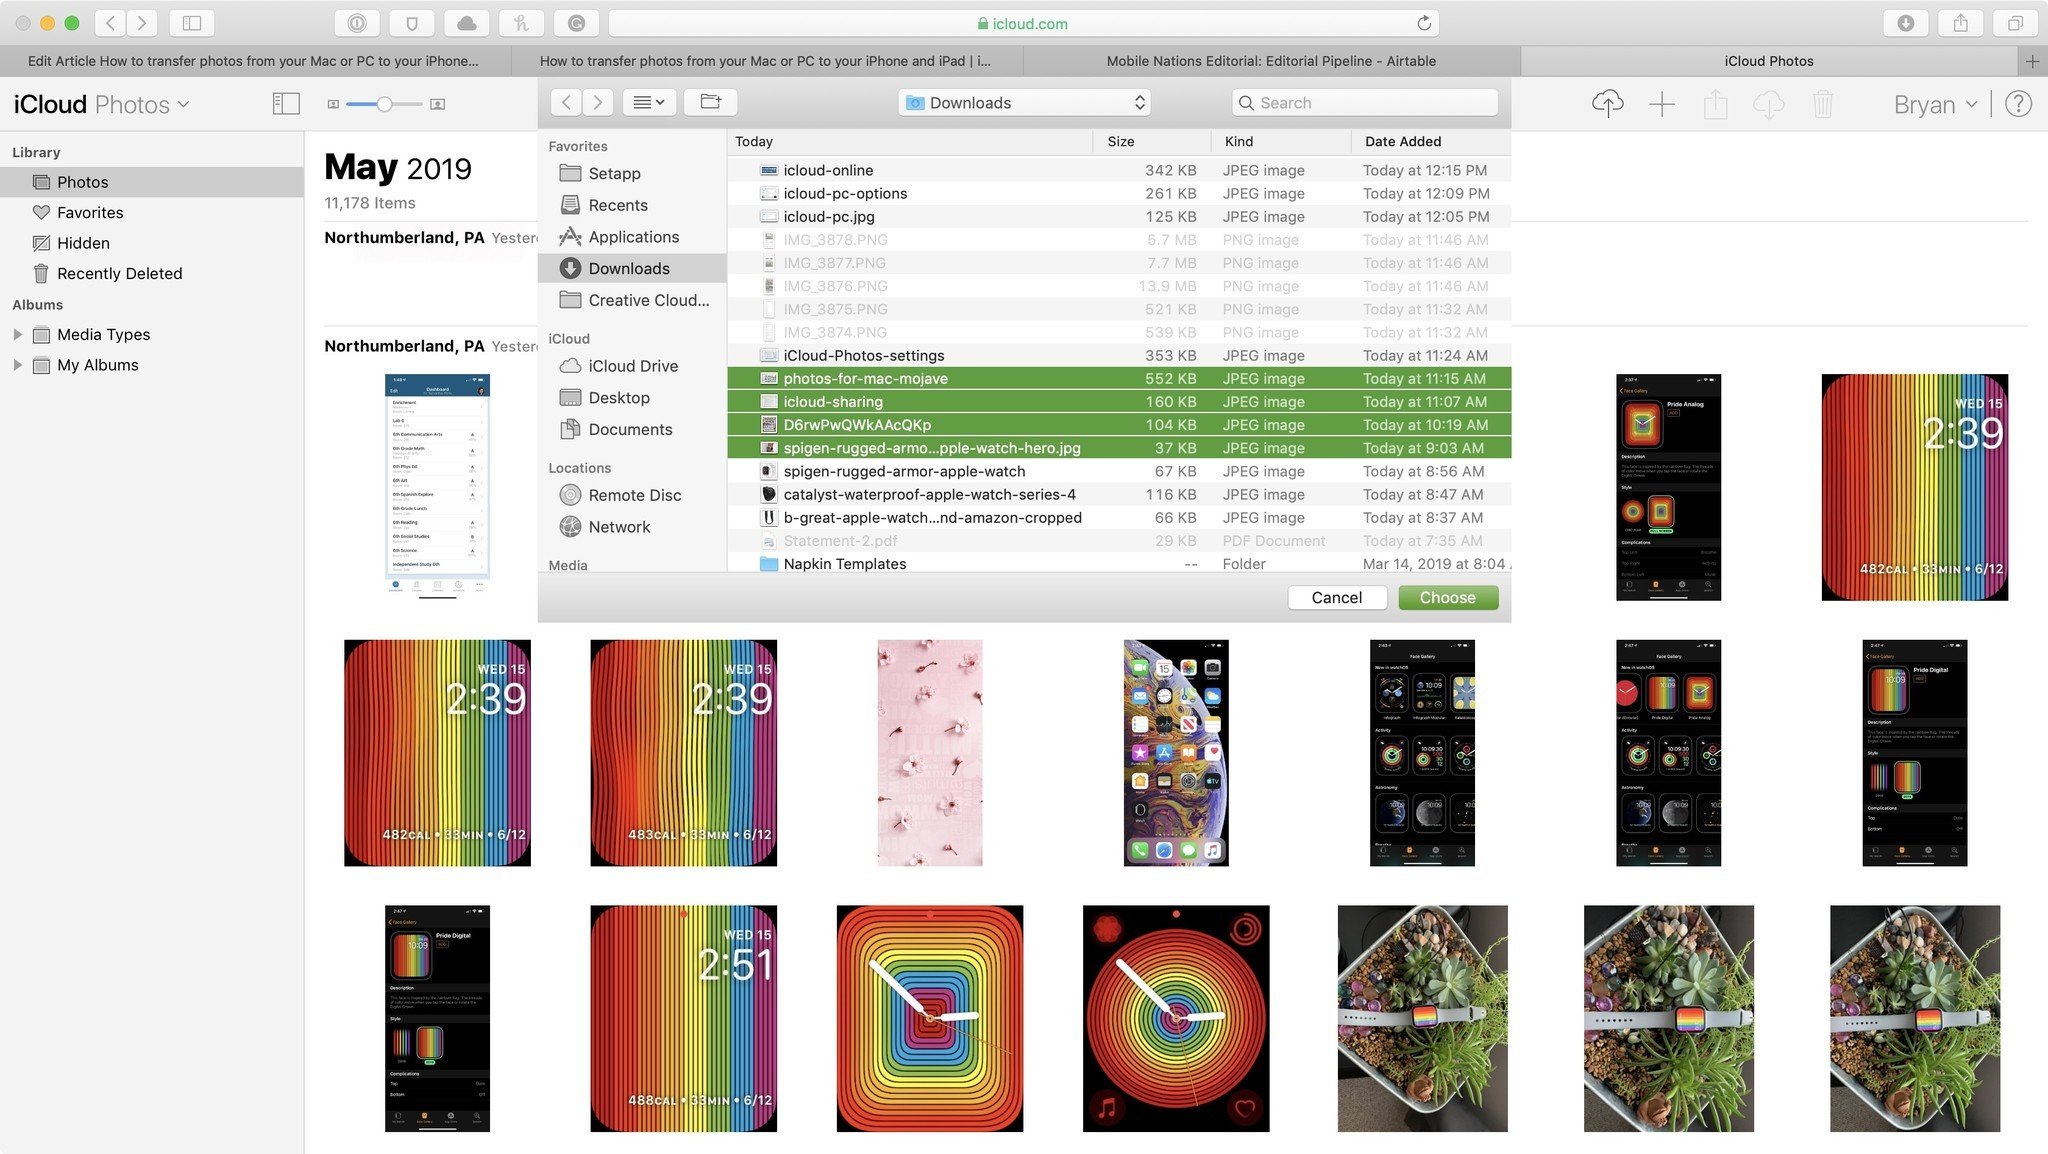
 - Choose the images from your hard drive that you want to upload.
-
Click Choose.
 Source: iMore


Your images will then get uploaded to iCloud Photos manually. A progress bar at the bottom of the screen lets you know how the uploads are going, and you can click Stop Upload at any time if you change your mind.
 Source: iMore
Sync via iTunes or Finder
For those who don't want to use iCloud Photos, you can do the good ol' syncing method with the computer itself. You know, with a — * le gasp* — cable.
If you are using macOS Mojave or earlier, then you will do this with iTunes. But if you are on macOS Catalina and later, you do this through the Finder, since Apple split iTunes up into separate Music, TV, and Podcasts apps.
The reason you may want to sync with your Mac with a cable is that because you may be running an older version of iPhoto or Aperture, you may have certain albums in Photos, or you have specific folders or albums of images in your Pictures folder. Therefore, it's important that before you manually sync through iTunes or Finder, you have all of your images that you want to transfer from Mac to iPhone organized appropriately.
- Ensure your photos are organized the way you want them to be organized.
- Plug in your iPhone or iPad to your Mac.
- Launch Finder (iTunes in macOS Mojave and earlier) if it doesn't open automatically.
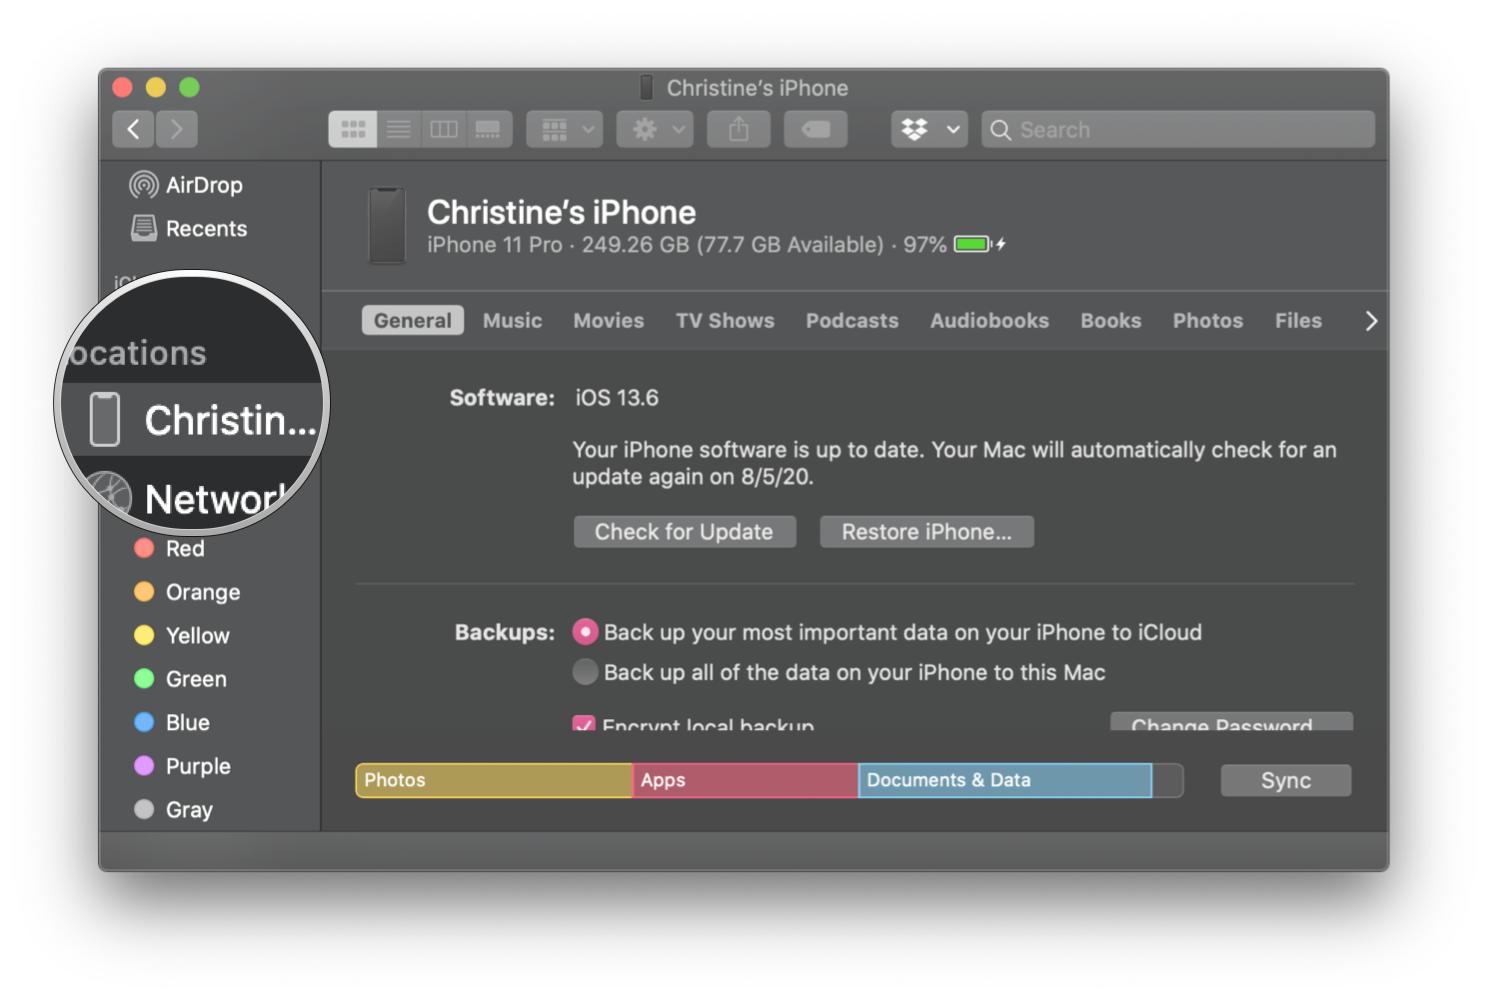
-
Click on your iOS device icon in the device list.
 Source: iMore
 -
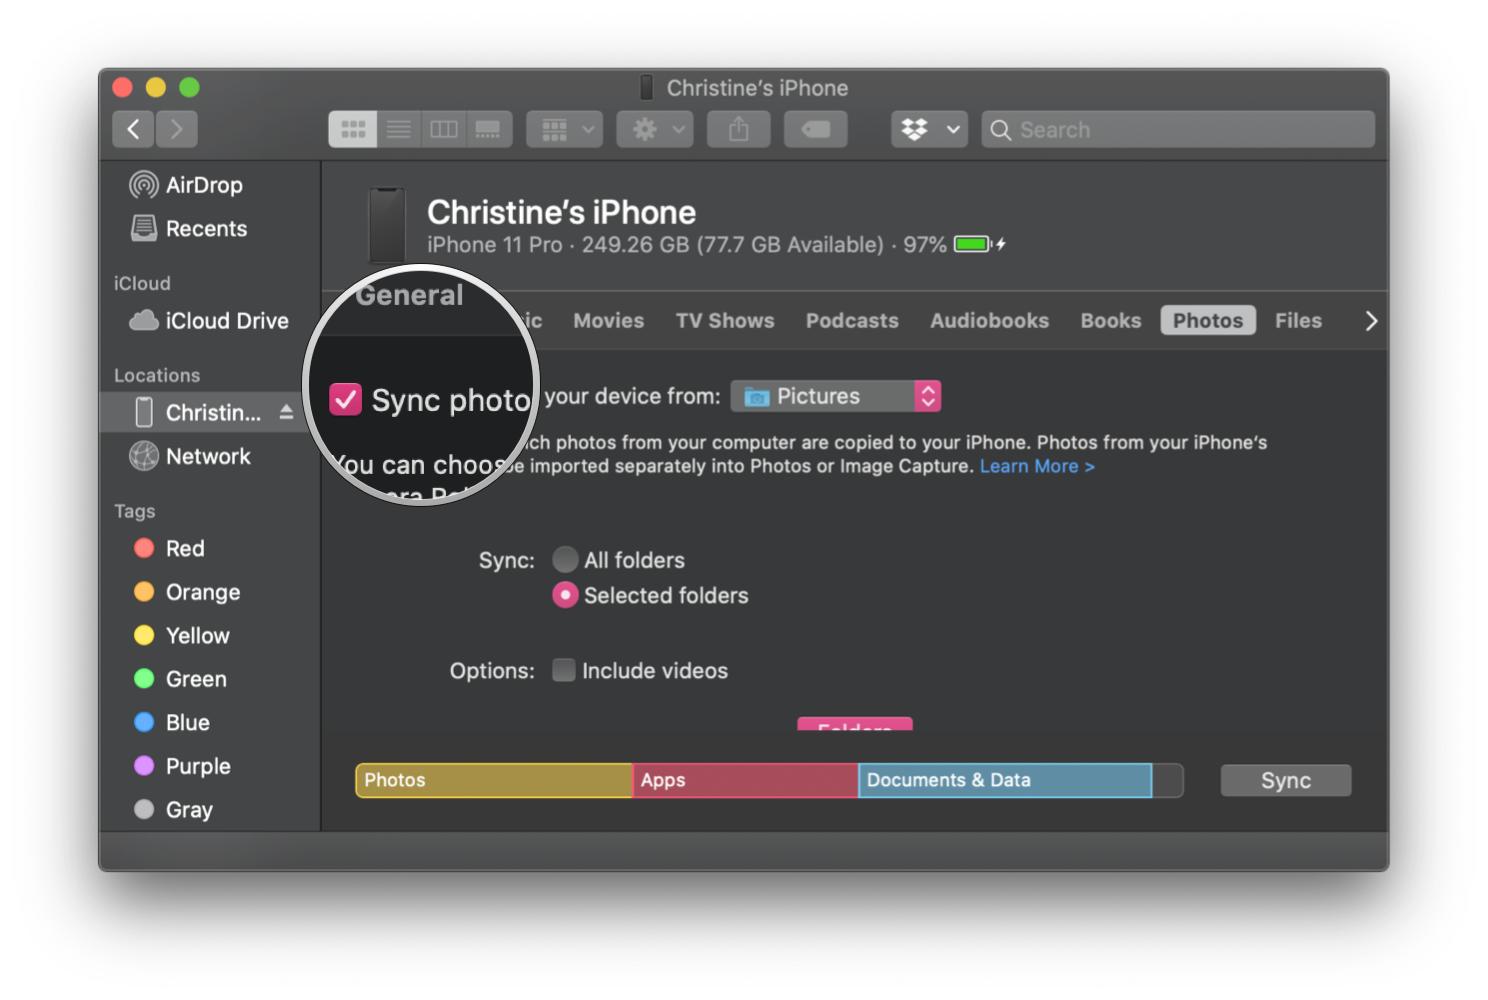
Click the Photos tab.
 Source: iMore
 -
Click the checkbox next to Sync Photos.
 Source: iMore
 - Click the source of the photos that you want to sync from in the drop-down menu.
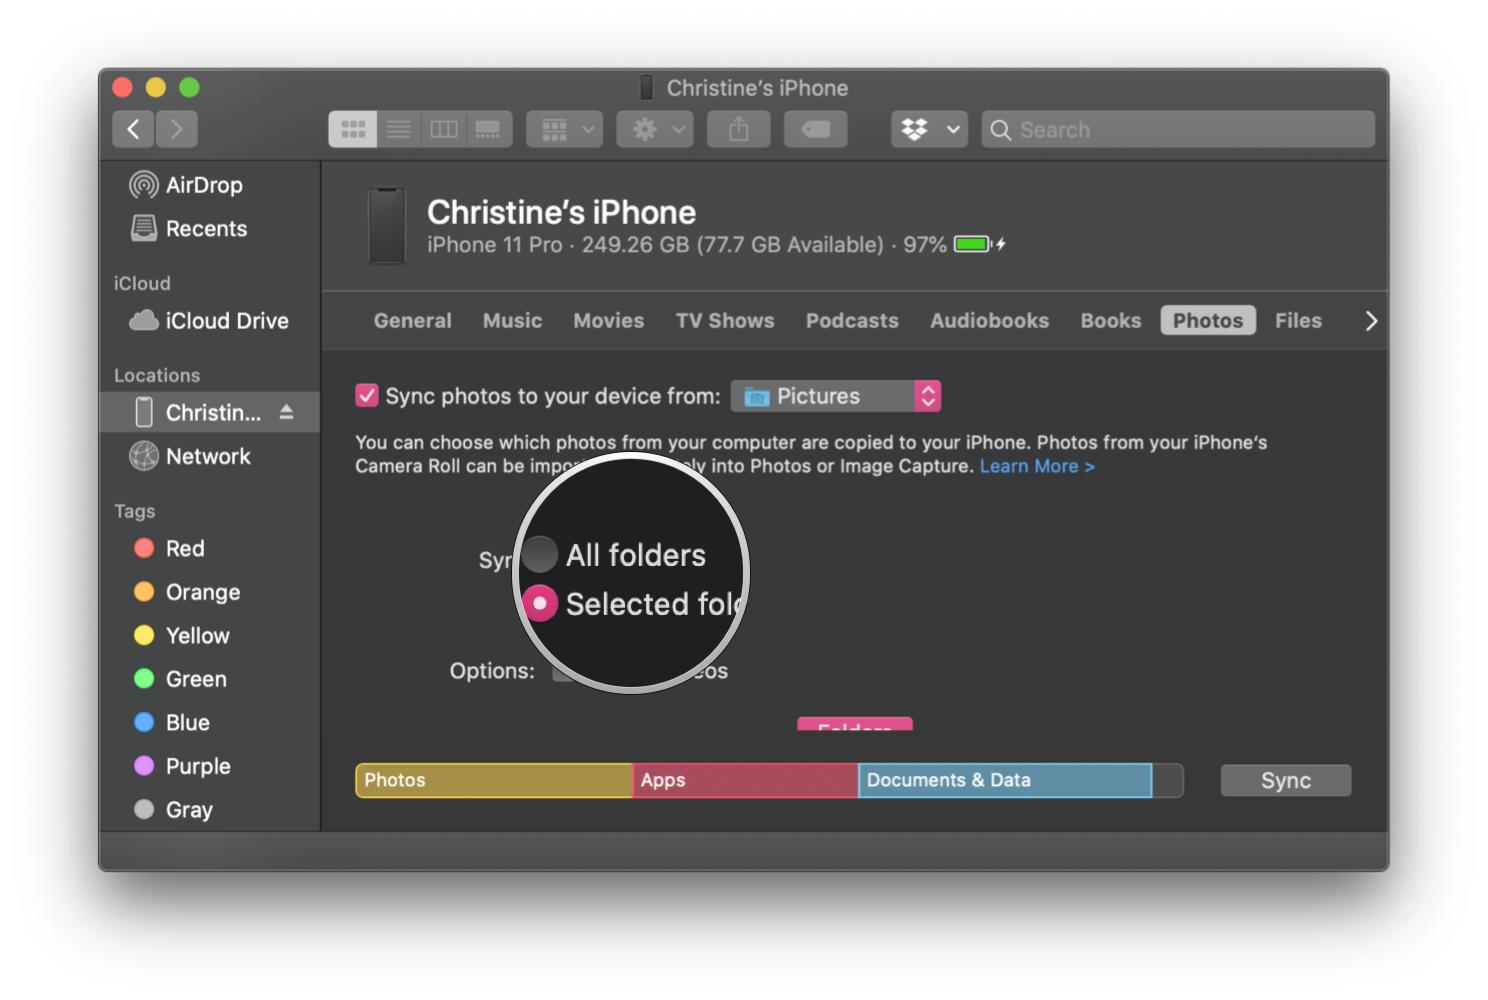
-
Click the checkbox next to the option you want: Sync All Folders or Sync Selected Folders.
 Source: iMore
 - Choose the Folders that you want to sync from your chosen source.
- Click the checkbox next to Include videos if you want.
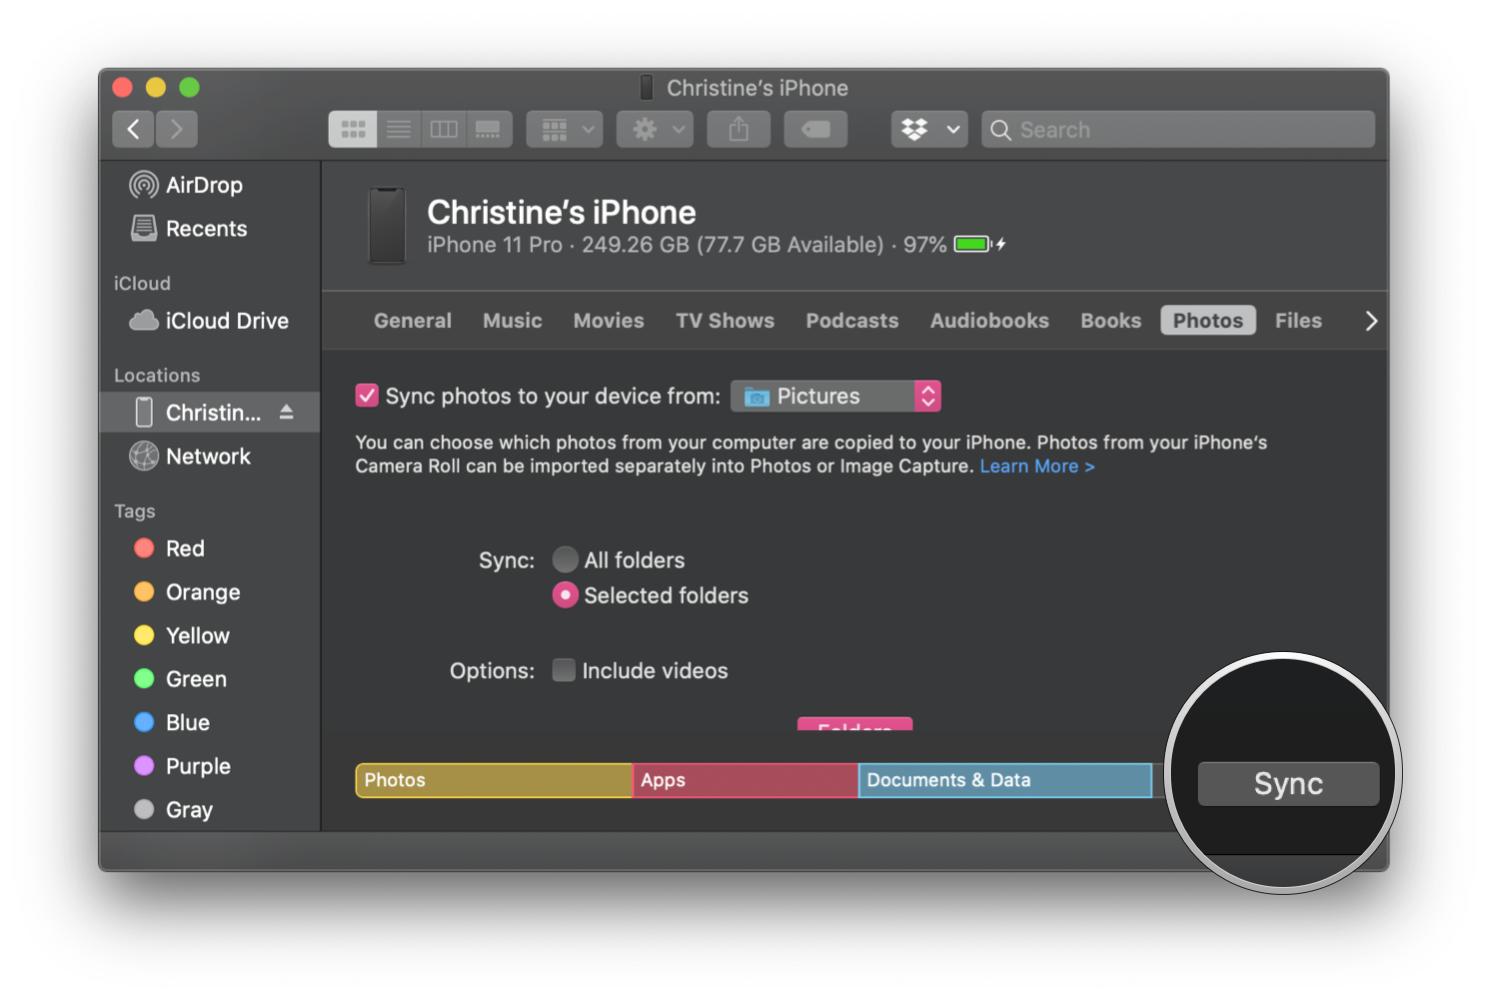
-
Click Sync in the bottom right corner to begin syncing.
 Source: iMore


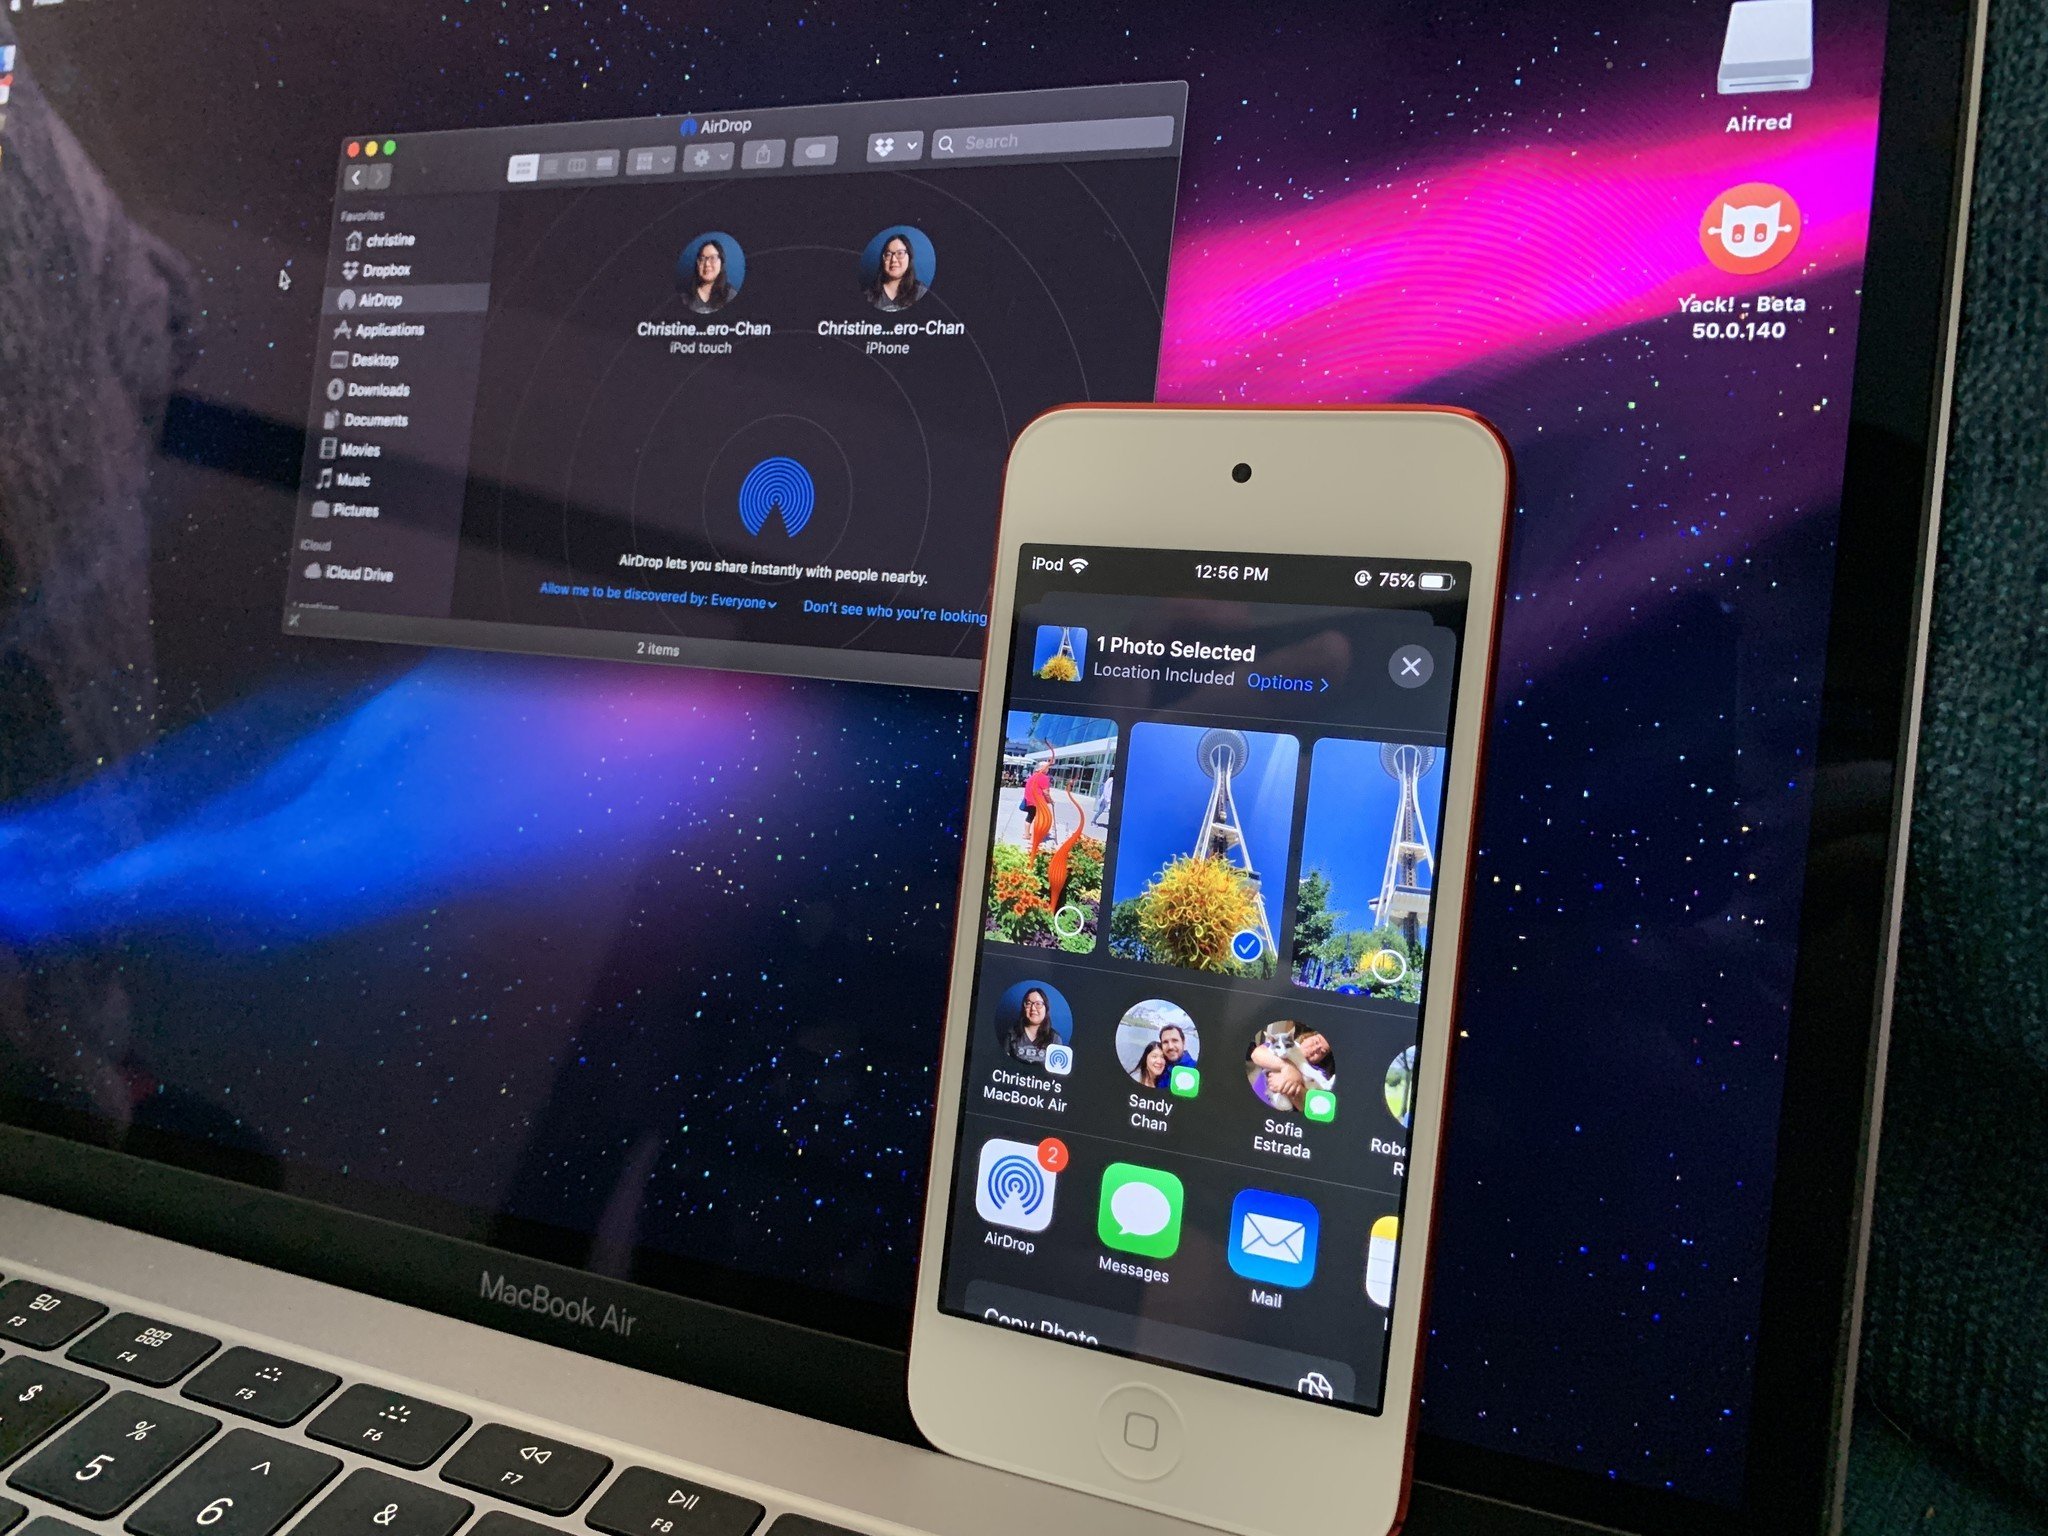
Use AirDrop to transfer photos from Mac to iPhone
One of the easiest ways to transfer photos from Mac to iPhone is with AirDrop. Apple introduced AirDrop back in OS X Lion (10.7), so your Mac should work with AirDrop, even if it's a little older (Lion works on Macs from 2008).
AirDrop uses Bluetooth Low Energy to broadcast, discover, and negotiate connections, allowing point-to-point Wi-Fi for transferring data. Between Macs and iPhones, and iPads, this is a quick and easy way to transfer files, such as photos and videos.
- Launch Finder on your Mac.
- Open a new Finder window or tab so that you can view two Finder locations at once.
- Locate and select the photos and video that you want to transfer to your iPhone or iPad.
-
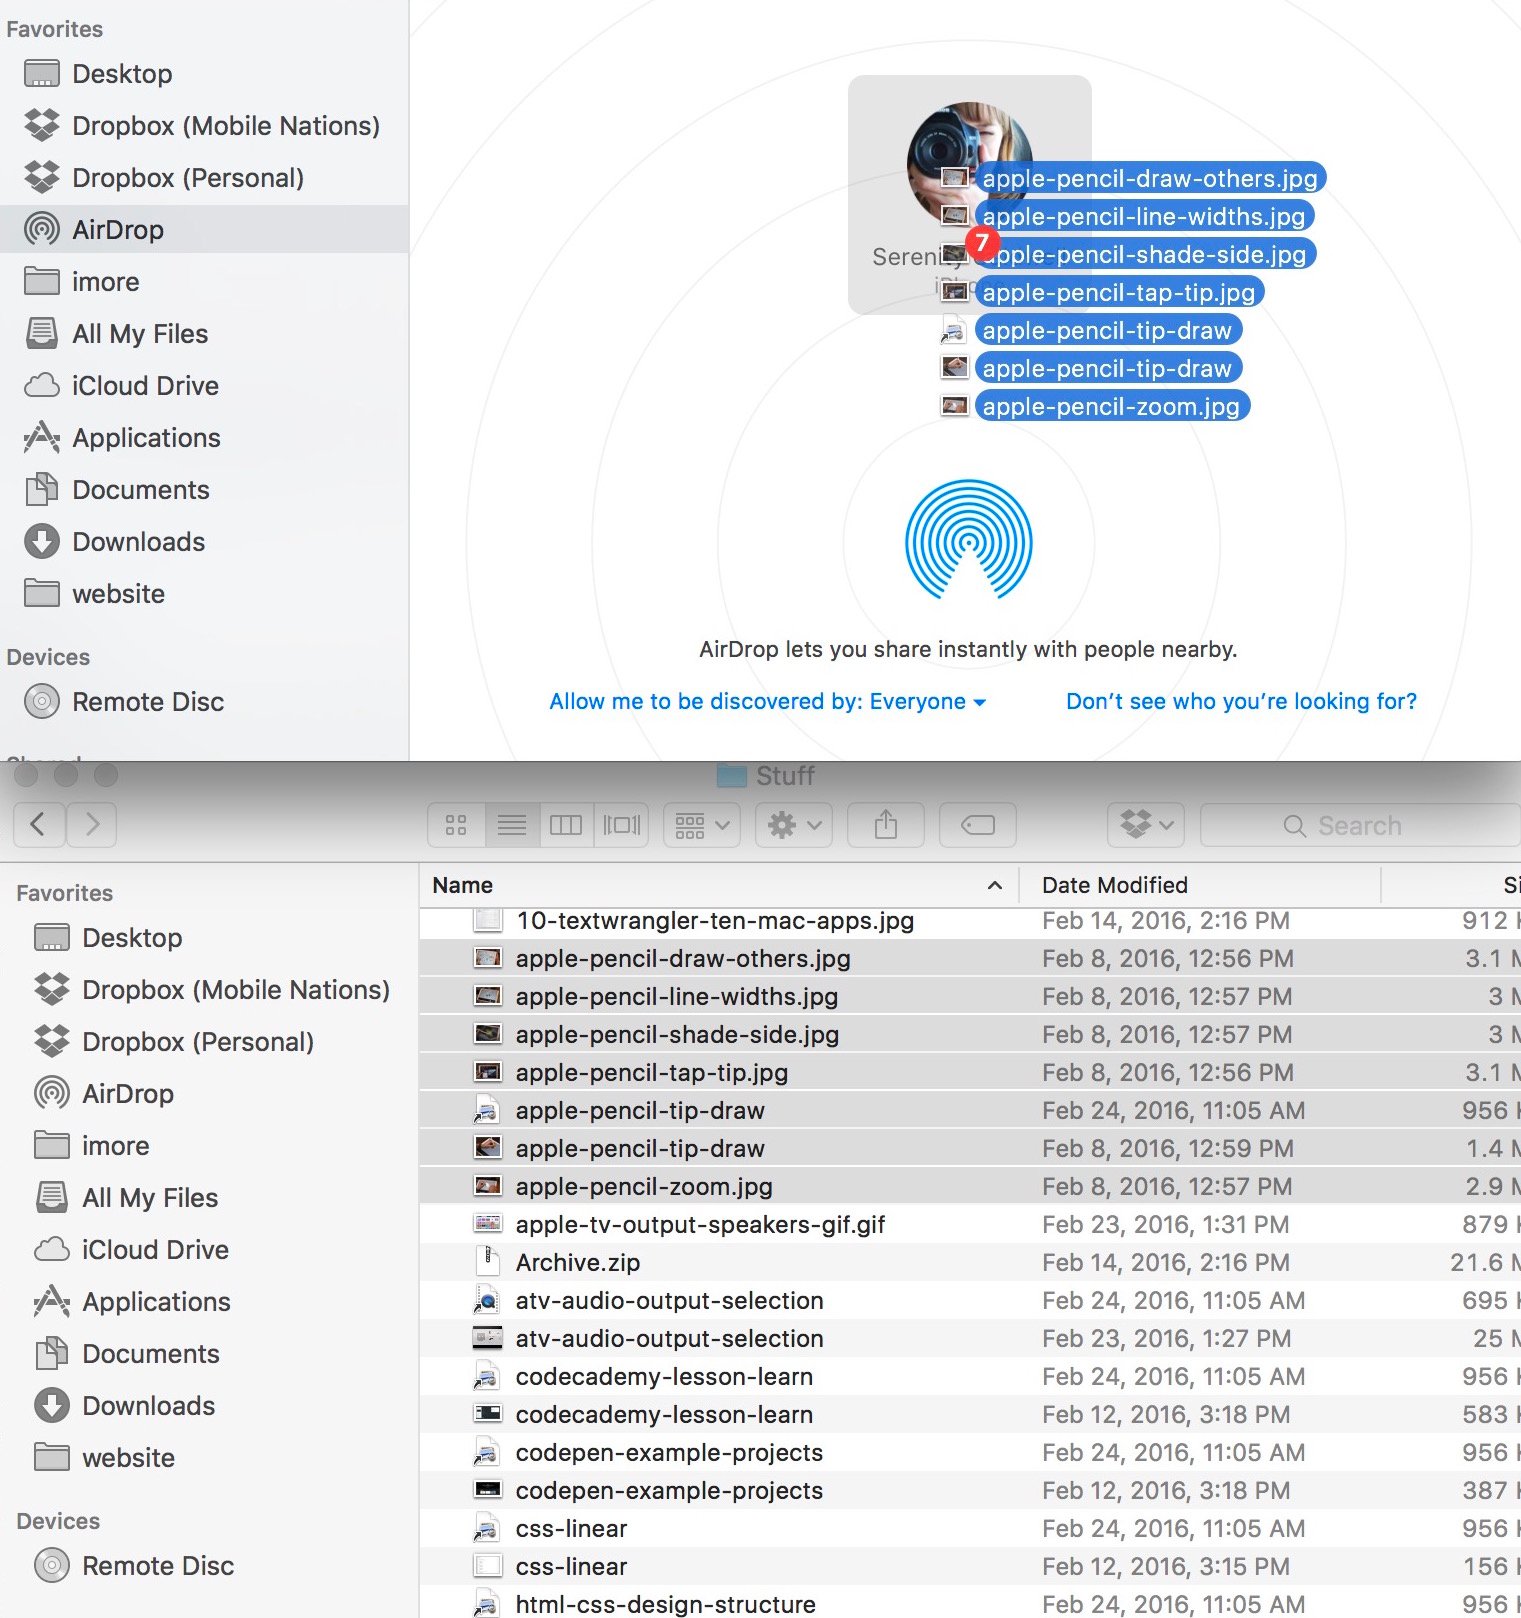
In the other Finder window or tab, click AirDrop from the side menu.
 Source: iMore
 - On your iPhone or iPad, make sure that it is unlocked and awake.
- Make sure that your iPhone or iPad has AirDrop receiving enabled and set to Everyone.
-
Drag your selected photos and video to the iPhone or iPad option in the AirDrop Finder window.
 Source: iMore
 - If your iPhone or iPad prompts you, tap Accept.

While AirDrop is excellent, it works best for smaller batches of photos and video rather than your entire photo library. If you want to transfer your entire library, it's best to use iCloud Photos or sync via Finder or iTunes.
Utilize a third-party syncing service
 Source: iMore
Another great option to consider when you need to transfer photos from Mac to iPhone is to use a third-party syncing service, like Dropbox. For example, you could upload your pictures to your Dropbox account directly on the web or add photos to your Dropbox folder once you install Dropbox on your Mac. Dropbox has an excellent walkthrough to help you get started if you're a newbie to the service. Then on your iPhone or iPad, download the Dropbox app and access your photos and videos directly.
![]()
Dropbox
Access all of your Dropbox files, including photos and video, right from your iPhone or iPad.
While I prefer to use Dropbox for my photos, there are also other options that you can use, such as Google Drive, Microsoft OneDrive, Amazon Drive, and more. It just comes down to personal preference here.
Questions?
These are just a few of the best ways on how to transfer photos from Mac to iPhone. If you have any questions, drop them in the comments below, and we'll do our best to help you out.
Updated August 2021: These are still the current steps for transferring photos from your Mac to your iPhone and iPad.
We may earn a commission for purchases using our links. Learn more.
How Do I Airdrop Mac To Iphone
Source: https://www.imore.com/heres-how-copy-photos-your-mac-or-pc-your-iphone-and-ipad
Posted by: dominquezyoureame.blogspot.com
0 Response to "How Do I Airdrop Mac To Iphone"
Post a Comment